

P.A.C. 5 Air Cannon Plans
 WARNING:
No Liability Is Assumed By The Developers Of This Website and All Literature
Is Provided Second Hand, Use It At Your Own Risk!
WARNING:
No Liability Is Assumed By The Developers Of This Website and All Literature
Is Provided Second Hand, Use It At Your Own Risk!
![]() P.A.C. 5 Potato Air Cannon Plans
P.A.C. 5 Potato Air Cannon Plans
The P.A.C. 5 Air Cannon Potato launcher is the most powerful of the P.A.C. models, and includes many unique features.
![]() -
Buy Now for Just $4.95
-
Buy Now for Just $4.95
Purchase these build it yourself P.A.C. 5 Potato Air Cannon Plans with fully detailed fabrication and assembly instruction.
The P.A.C. 5 Pneumatic Potato Air Cannon
High Powered Pneumatic Launcher - P.A.C. 5
This is the fifth P.A.C. pressurized air cannon made (the P.A.C. 5) and it happens to be one of the most powerful cannons constructed. In a test, this cannon shot potatoes over twice as far as a previous version the P.A.C. 4.
Registered shot: 1,276 feet with a specially made PVC dart. The dart is a lightweight PVC projectile with fins that creates a spin on the dart. This creates stability and accuracy.
Testing the Launcher - 1998
This cannon uses a different firing mechanism than the previous P.A.C. launcher models. It uses a piston that acts like an oversized check valve. The air chamber surrounds the barrel and has a piston inside of it, which allows the air to enter the barrel. With cannons that use sprinkler valves, only a small amount of air can be let into the barrel at once because the hole in the valve is so small. However with this type of cannon, the piston flies back several inches, allowing much more air to enter the barrel at once. This new method is the main reason why it is so powerful. You can look at my What's a Pneumatic Cannon? page for more info.
- Piston & Bumper Construction
- Barrel Construction
- Chamber Construction/Air Control Assembly
- Cannon Stand
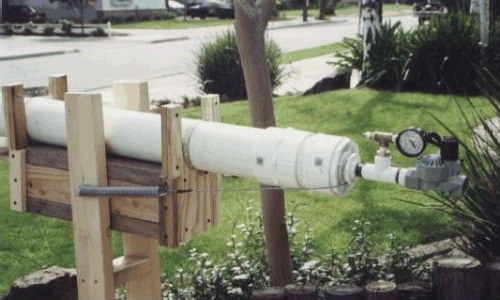
Specs: The chamber is 4"wide by 4ft long. The main barrel is 2" by 6ft. long however it has smaller interchangeable barrels. It uses a 3" coupler as a piston with 1/8" Hard neoprene with cloth insert as the diaphragm material.


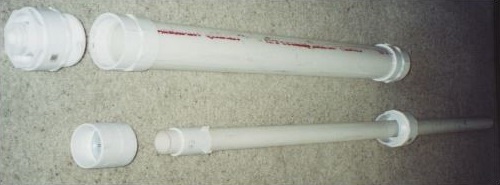
P.A.C. 5 Piston - Bumper & Barrel Construction
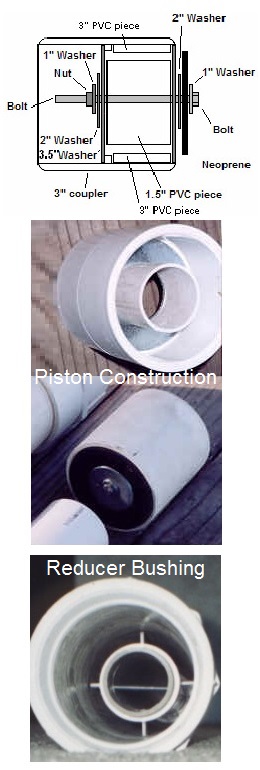
1/4" Hard neoprene with cloth insert (1000PSI) was used for the diaphragm material.
This material is much stronger and is actually pressure tested to withstand the extreme pressures.
Do not use wetsuit neoprene for it is far too weak.
To the right is a simple diagram of how the piston is constructed:
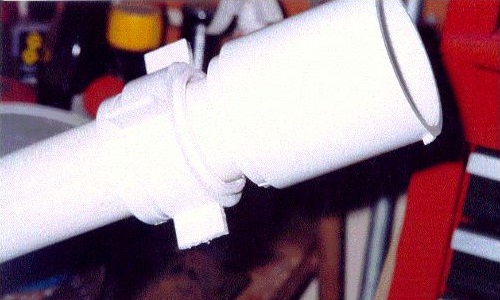
This 4"x2" Reducer Bushing is used to stabilize the barrel in the chamber.
The outsides are cut away until it fits inside the chamber.
The barrel is positioned inside the chamber by the 4"x2" Reducer Bushing:
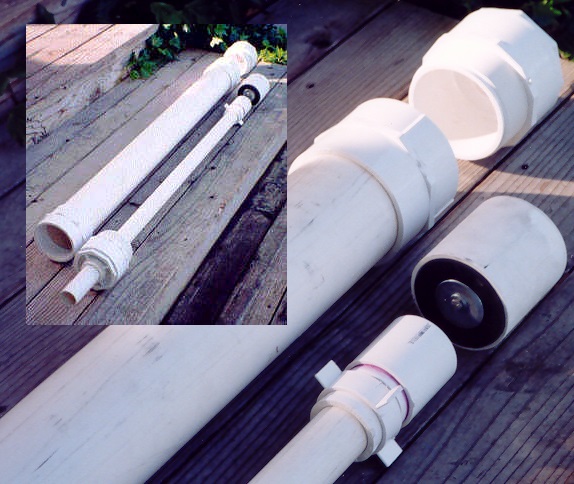
P.A.C. 5 Barrel Assembly next to the chamber
Chamber Construction / Air Control Assembly
The large threaded fittings make for easy access to the piston.
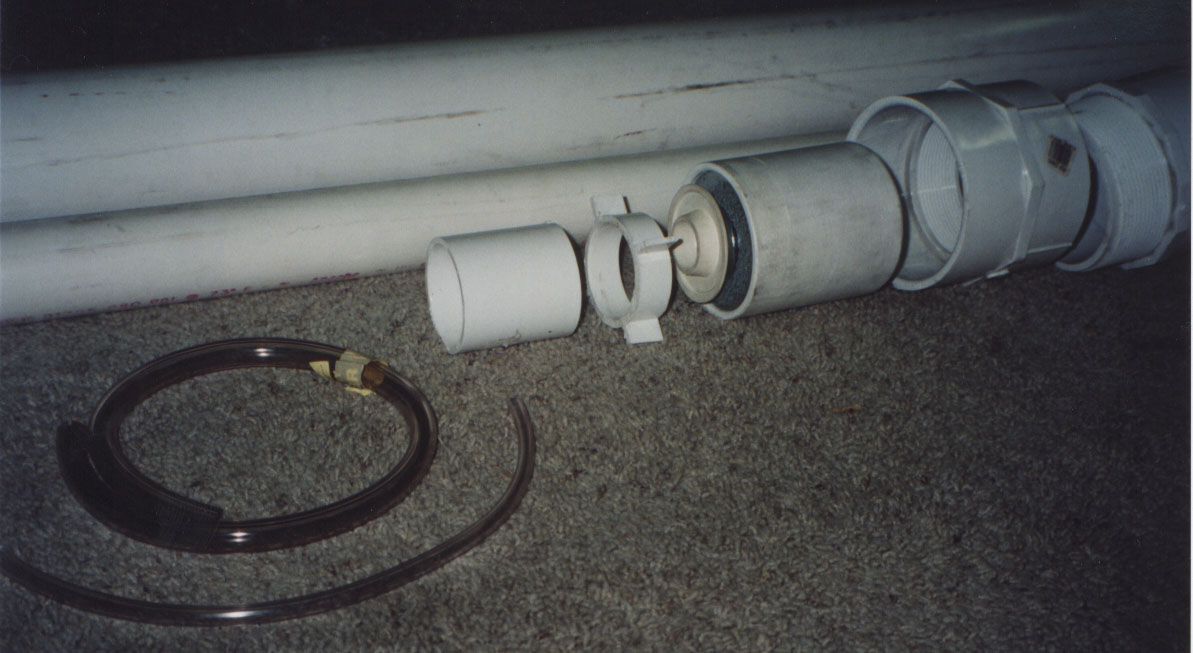
Here is a picture of the parts I used in the chamber.
You can see the tubing used for the bumper, 2" barrel and 4" chamber.
Shown is also the 2"x4" reducer cut away to make the support.
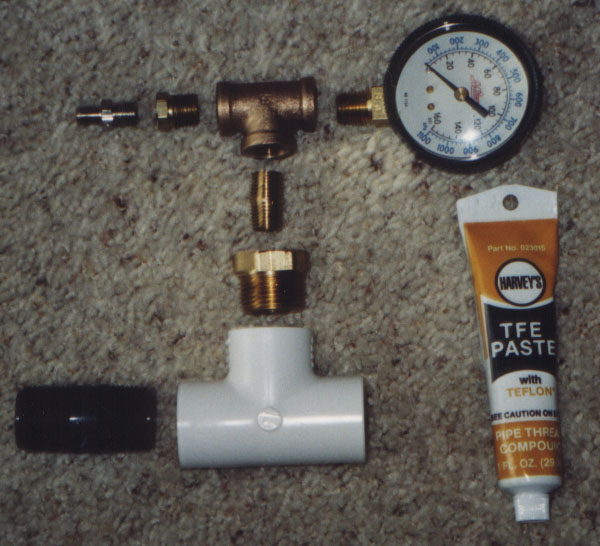
This picture basically shows what was fabricated for the air inlet and air pressure gauge to be assembled and installed on the cannon.
This picture is of the assembly in its disassembled state.
You can see the TFE paste that was used to seal the threads.
Brass fittings work well for the job at hand and will hold up to the pressure that it will be subjected to.
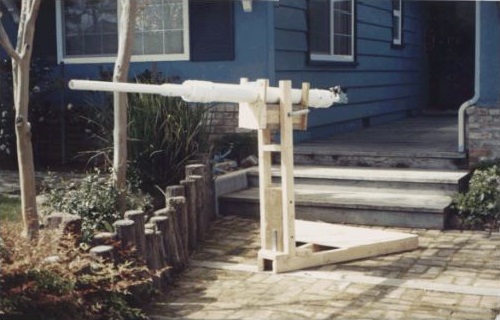
The P.A.C. 5 Cannon Stand
Here
is the cannon stand that was
used to hold the cannon.
It uses a set of springs to help withstand the huge recoil of the cannon firing.
The springs are attached to two cables, which are attached around the 4"x2" bushing.
To
prevent the cannon from springing out of the stand after being fired
(reverse effect).
A homemade hose clamp was made out of some plumbers tape which holds it in place quite nicely.
You can see the springs and the cable.
The cannon sits inside the cradle shown here