TSTP Air Cannon Plans
WARNING: No Liability Is Assumed By The Developers Of This Website and All Literature Is Provided Second Hand, Use It At Your Own Risk!
For Firing Toilet Paper or T-Shirts
Pneumatic T-Shirt / Toilet Paper Air Cannon Plans
How to Build a T-Shirt / Toilet Paper Air Cannon
 The
PAL Pneumatic TSTP Air Cannon is perfect for toilet paper and t-shirt launching.
Propelling a 4" projectile like toilet paper and t-shirts into a crowd, or into your neighbors trees, just for fun!
Its all easy with the TSTP Launcher Air Cannon!
 These
build it yourself TSTP air cannon plans are FREE but you can always support our cause for
compiling this air cannon resource to insure we can afford to keep it up on the internet
for you!
TSTP 4" Projectile Air Cannon Plans
Fabrication Materials & Assembly Instructions
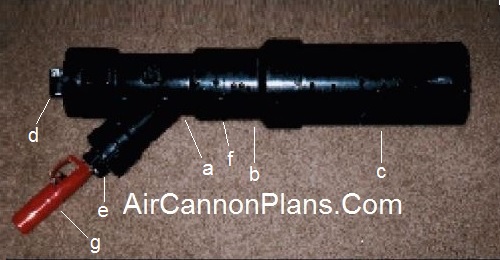
Component Parts (all parts are scheduling 40 PVC)
- A) 3" by 3" by 1.5" (looks like a lower case y (see below)
- B) 3" to 4" bell reducer (looks like a funnel)
- C) 4" PVC that is 10.5" long
- D) 3" Cleanout and cap (it screws in)
- E) 1.5" Clean out and cap (it screws in)
- F) About 3" of 3" (this connects the reducer to the chamber)
- G) BBQ igniter or Pneumatic Add-On.

Assembly and Wadding Materials
- PVC cement (make sure it says that on the bottle)
- PVC Primer
- A couple pieces of cardboard to make a wadding
- Of course a couple rolls of toilet paper!! or t-shirts
TSTP Air Cannon Fabrication and Assembly
Assemble all parts to look like the diagram below.
Cut the barrel to length, then take your PVC primer and spread it on all the joints that will be glued. Make sure you don’t get any primer or glue on the threads of the cleanouts.
Now take the PVC cement and put it on one joint at a time. Meaning you put it on the joint then assemble it right away. Then go on to the next one.
Just a couple notes. Use a hammer to make sure the barrel is all the way back in the reducer. Make sure all parts are fully pushed together.
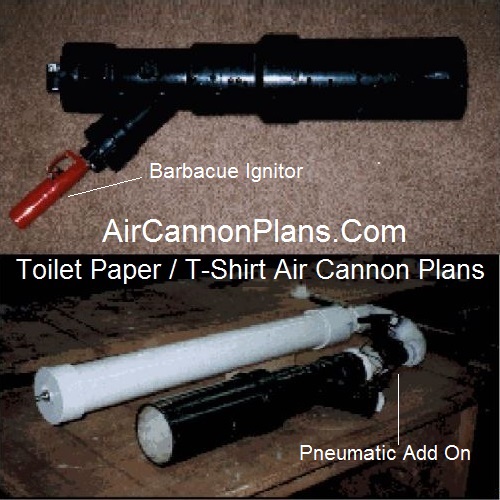
Install the barbecue igniter for fuel based ignition by drilling a snug hole for it in the end cap and attaching securely, or go with the pneumatic add on for straight air pressure as shown below.
Cardboard Wadding
To make this work you might want a drawing compass to help you cut the circles. If you don’t have one you can take a piece of cardboard and put it up against the barrel and trace around it. So which ever you choose to do make the circles 4" in diameter. You can use scissors to cut them out. Keep them close in size. Make 2 or 4 of these. Tape them or hot glue them together. That should be your wadding. Sand the edges a little for better performance.
Powered By Combustible Vapor, or Pneumatic Air Pressure

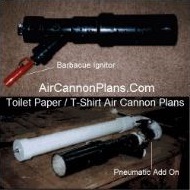
You can power this cannon with a BBQ igniter and combustible vapor (component G above), or use my Pneumatic Add-On. Both ways are very impressive. You can see the differences pictured above. The bottom picture shows an added air chamber for adding noncombustible air to the pneumatic firing air pressure system.